
1 · Getting started
On this page
Installing Inky Mall OS, the first launch, the owner's PIN, a tour of the top bar — and, first, the one thing every owner asks about.
How updates work
Inky updates itself. You don't download anything, and you never reinstall.
Every time Inky starts it checks for a newer version. When one is ready, a bar appears across the top of the register:

- The bar. It appears when a newer version is ready. The register underneath keeps working — nothing is interrupted, and you can carry on ringing sales with it there.
- Update & restart. Click it when the counter is quiet. Inky downloads the update (a progress figure shows on the button), restarts on the new version in a few seconds, and your data is exactly where you left it. That is the whole procedure.
- Later puts it off until the next start.
To check on demand, open the ⋯ menu in the top bar and click Version (see the top bar below). If it says you're up to date, you are; if a check fails — no internet, say — it tells you that rather than pretending.
Updating never touches your data. The store — items, booths, sales, payouts — lives in a file of its own on this computer, and an update replaces the program, not the file.
Installing
Download the installer for Windows or Mac from get-inky.com, run it, and open Inky Mall OS. It's built to be light on old hardware: a basement mall's ten-year-old computer is fine.
Inky runs entirely on this computer. It needs the internet for exactly three things — activating and renewing a licence, checking for updates, and (optionally) Cloud+ — and none of them ever stops the register from ringing a sale.
The first launch
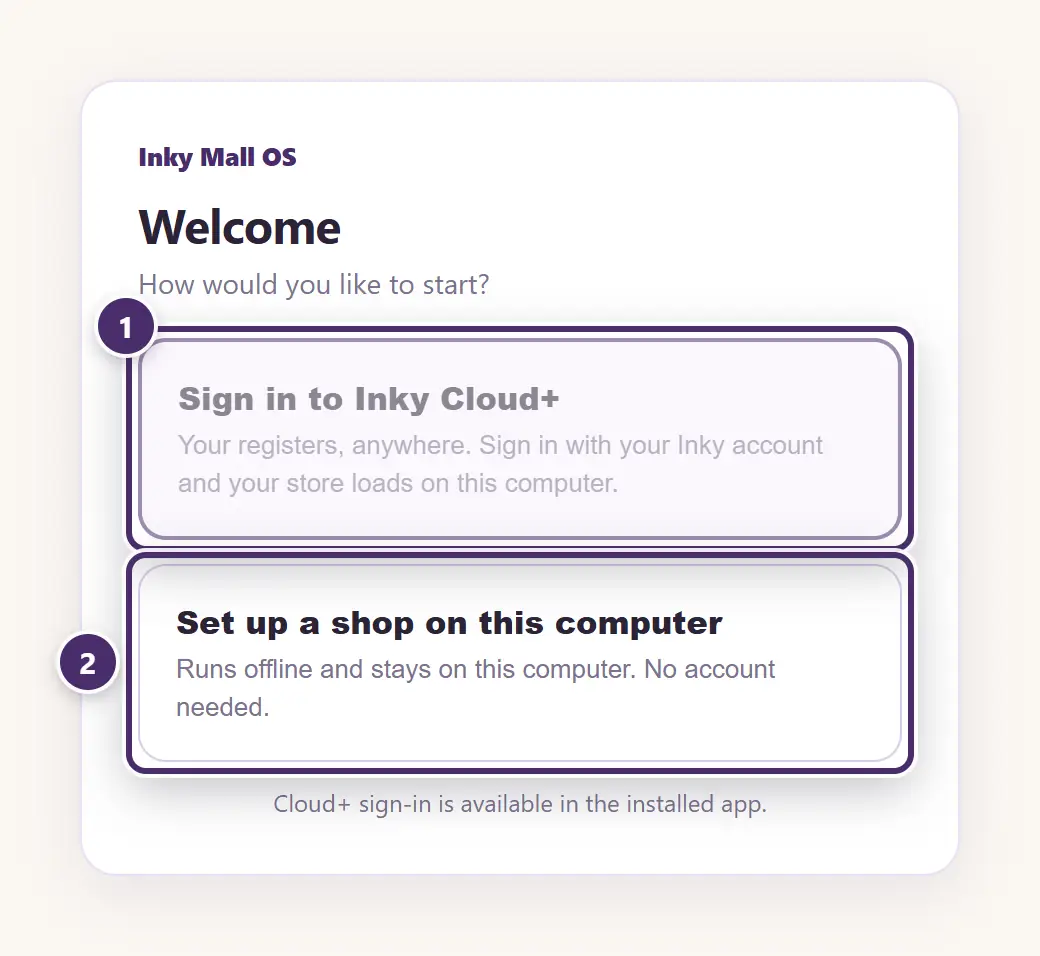
- Sign in to Inky Cloud+. For a shop that already exists on your Inky account — a second register, or a replacement computer. Your browser opens to sign in, your store loads on this computer, and there is nothing to set up again. See Cloud+ & sync.
- Set up a shop on this computer. For a new shop, or one that will run without the cloud. Two questions and you're at the register.
(The picture was taken in the preview build, which is why the Cloud+ door is greyed; in the installed app both are live.)
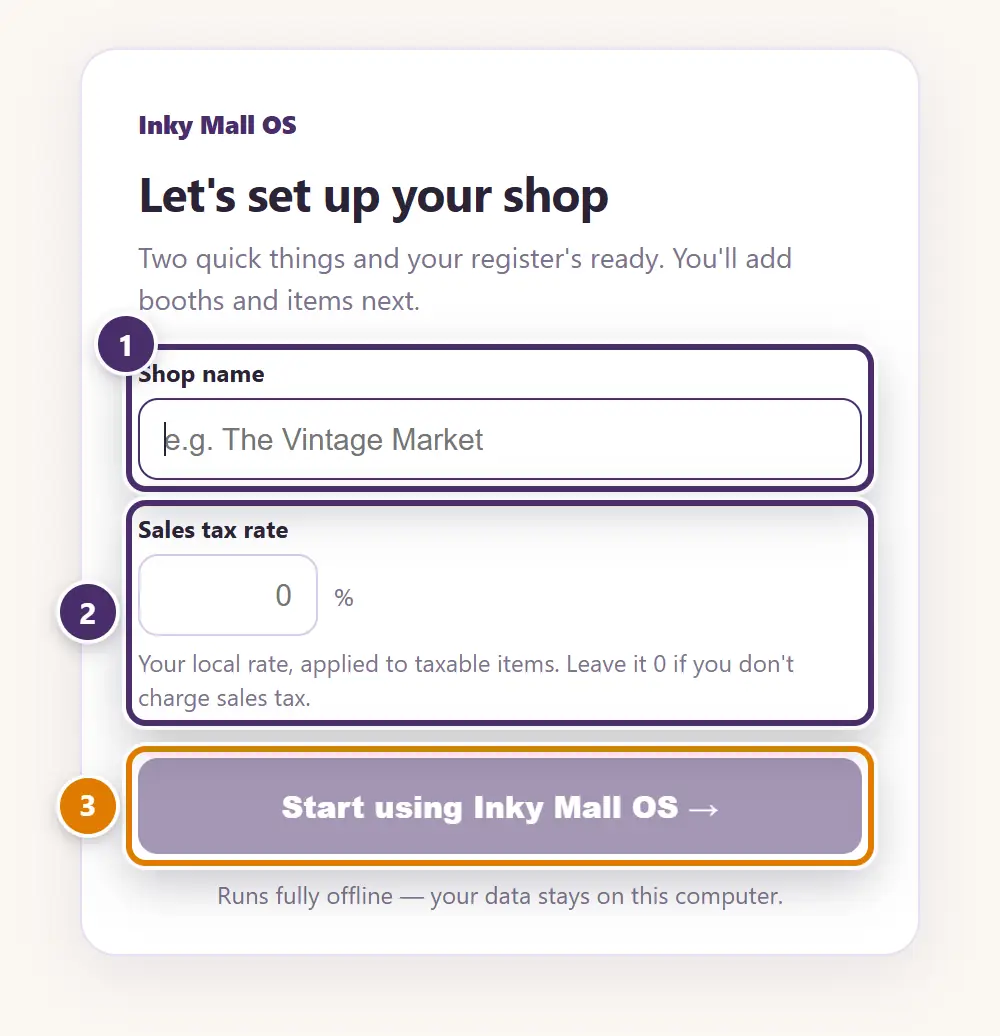
- The shop's name. It shows in the top bar and prints on every receipt. You can change it later in Settings.
- Your sales tax rate. Applied to every taxable item at checkout. Leave it at 0 if you don't charge sales tax. Also changeable later.
- Open the register.
That's it — you're at an empty register. A new install runs as a 30-day free trial with everything working; a slim bar above the register counts the days and offers to buy. Licensing & plans explains what happens when it ends — nothing is lost: the data stays, and a licence unlocks it on the spot.
The owner's PIN
The first time you open a back-office tab — Financials, Payouts, Vendor Management, Cash & Credit, Staff or Settings — Inky asks you to create the owner's PIN.
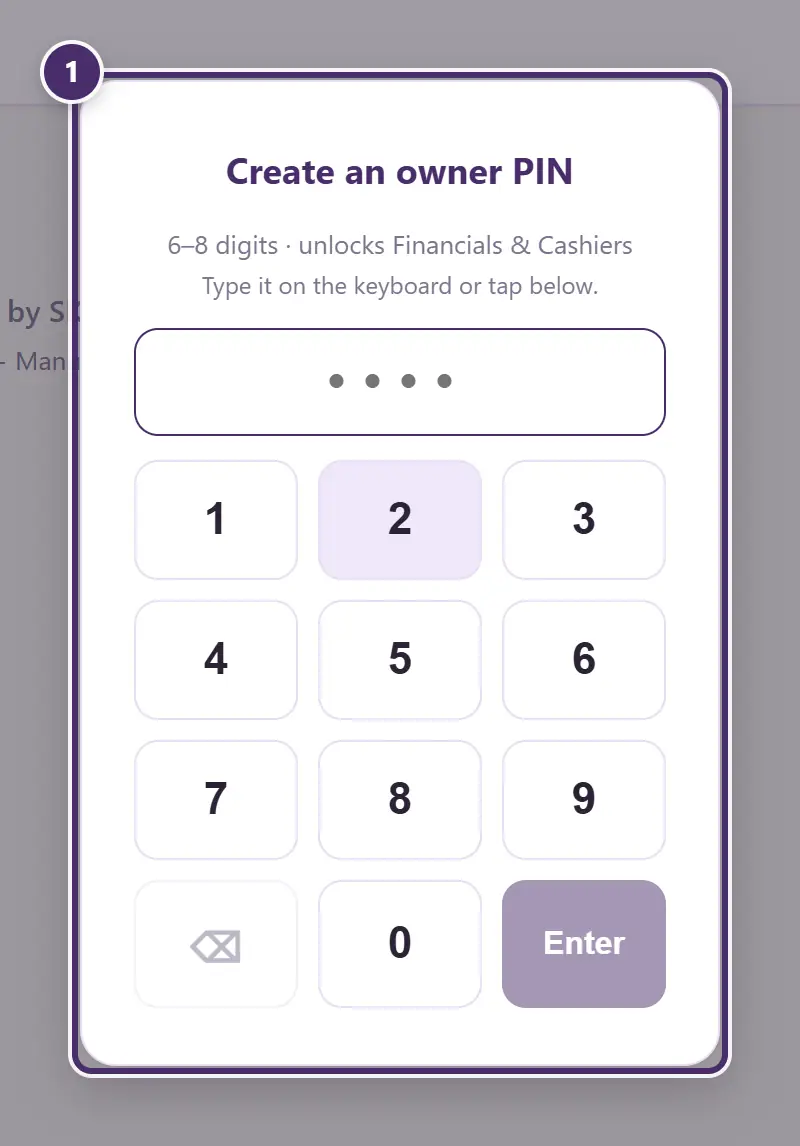
- Six to eight digits. It guards the back office from then on, so pick something you won't share with the counter. The register never changes it once set; if it must change — or it's forgotten — that's done from your Inky account on the web (Store → Setup). Everything about PINs, staff and managers is in Staff & security.
The top bar

- The shop's name. On a Pro shop with more than one location, it opens the location switcher.
- The tabs. Register, Items and Sales are open to everyone at the counter; the padlocked tabs need the owner's PIN.
- Time clock — staff clock in and out here.
- Vendor — a vendor signs in with their booth PIN to see their own sales.
- Owner — unlocks the back office; it reads Owner · Lock while it's open, and clicking it again locks up.
- ⋯ — the plan, Cloud+ status, the version and update check, this guide, and the sync log.
- Today — everything rung on this register since midnight. The number most owners glance at all day.
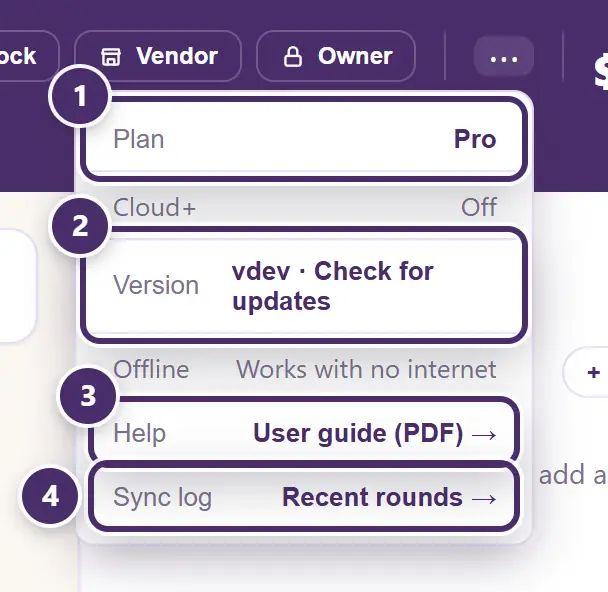
- Plan. Which edition this register is on. Click it to manage the licence.
- Version. Which build you're running (v0.10.6, say). Click it to check for an update right now.
- Help. Opens this guide — the whole manual as one searchable PDF — in your browser, so it can sit beside the register while you read. Ctrl+F (⌘F on a Mac) finds any word in it.
- Sync log. The last sync rounds, on a Cloud+ shop. Between them: whether Cloud+ is on, and a reminder that Inky works with no internet.
Where your data lives
The whole store — items, booths, sales, payouts, staff, the lot — is one file on this computer, saved after every change. If the computer has a OneDrive folder, Inky keeps the file in the Inky Mall OS folder there, so that if OneDrive is signed in and syncing you get an off-machine copy for free; otherwise it's in the Inky Mall OS folder in Documents. The register says which, in small print under the money buttons: Saved in your OneDrive folder or Saved on this computer.
Inky never sends that file anywhere. On a Cloud+ shop the contents sync to your Inky account and your other registers — but that is a choice you make, in Settings, and the file on this computer stays the working copy either way. Backups, restores and moving to a new computer are in Your data.
What to set up next
In roughly the order a new shop needs them:
- Booths — Vendor Management: every item belongs to one.
- Items — Items & inventory, or Bring your store over in Settings if you're coming from another system (Your data).
- Labels — a label printer, or Avery sheets on the printer you have (Labels & printing).
- Staff — PINs for the counter, and whether to require login (Staff & security).
- The receipt printer and cash drawer, if you use them (Labels & printing).
- Payment methods — which tenders show at checkout, and a card fee if you charge one (Taking payment).
Then ring a sale — The register.
Guide for Inky Mall OS 0.16.0, updated Nov 20, 2026 · Download the whole guide (PDF)